Example Scenarios
In this section you will find a number of example scenarios for using the Apportunix Custom Fields extension that should help you configure and use the extension.
Add a Custom Field for Customers
To set up a custom field for customers:
- Open the Custom Field Definitions page.
-
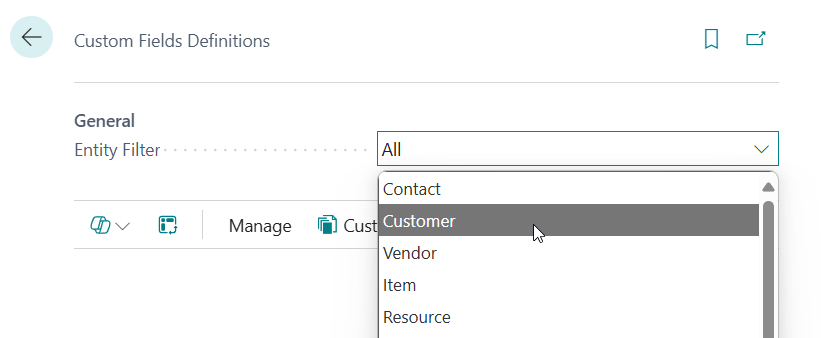
Change the Entity Filter to Customer to restrict the overview to the customer Customer fields only (optional).
-
Add a new line, change the Type field to the desired field type, e.g., Boolean.
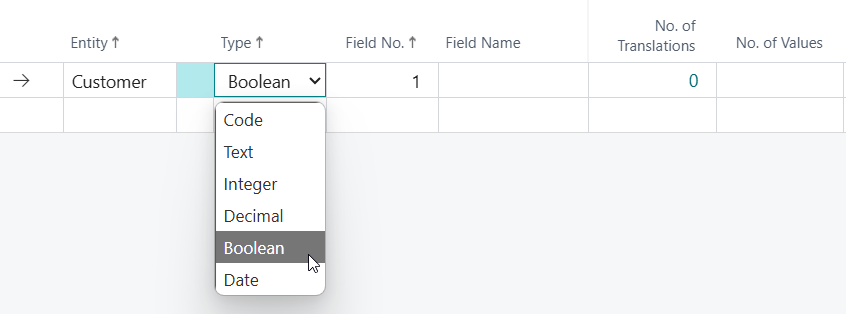
The Field No. field will automatically be filled with the next available field number.
Fill in the desired Field Name (mandatory).
-
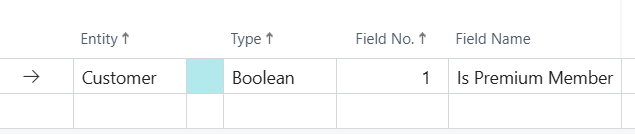
When the line inserted, the system will automatically add a translation for language "English (United States)" for the custom field. The default value is the same as the provided Field Name.
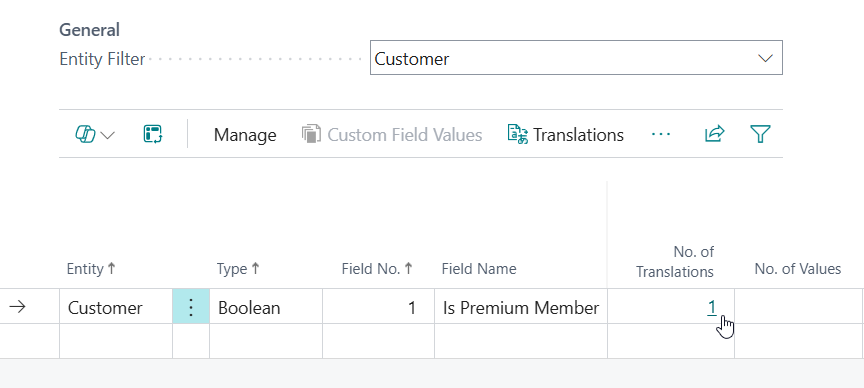
You can add additional translations for other relevant languages via the Custom Fields Translations page, which can be opened by invoking the Translations action, or by drilling down on the Number of Translations field.
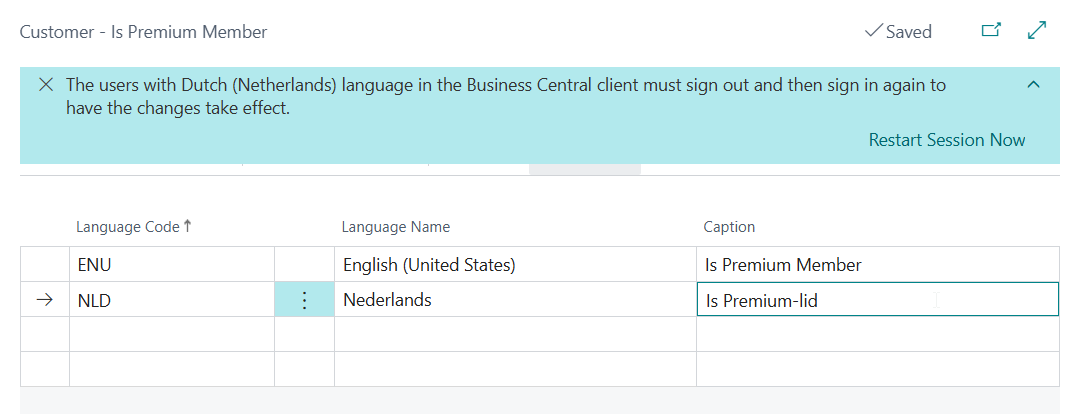
Here is an example where a translation for the custom field caption is provided for the languages "English (United States)" and Dutch (Netherlands):
-
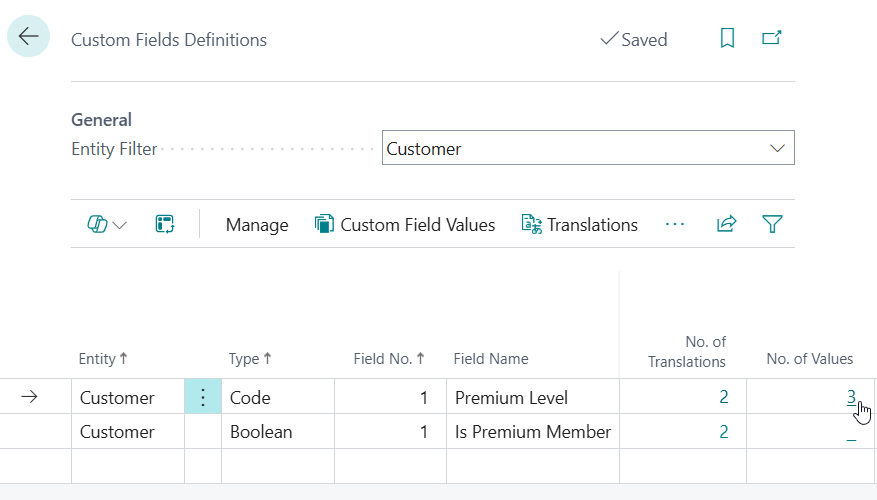
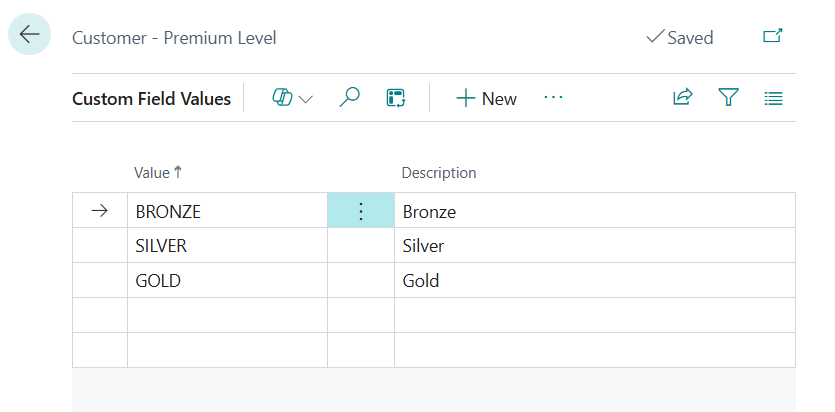
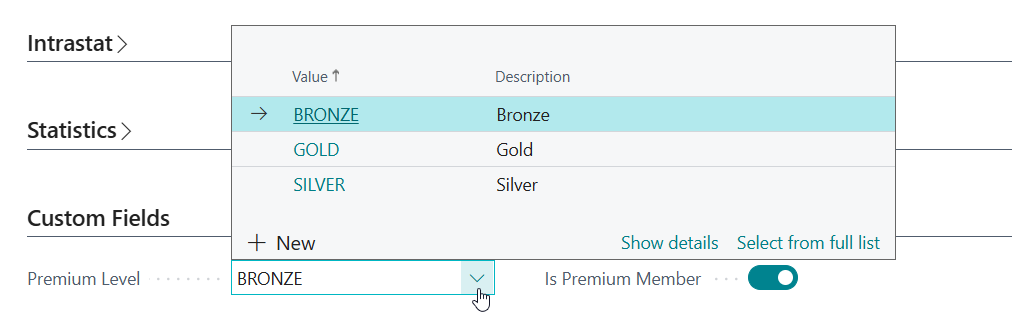
For custom fields with Type = Code, it is possible to set up valid values via the Custom Field Values page, which can be opened by invoking the Custom Field Values action or by drilling down on the No. of Values field.
-
After the users log out and log in again, the newly defined custom fields will be available on the list and card page (for the card page the custom fields are available on the Custom Fields tab).
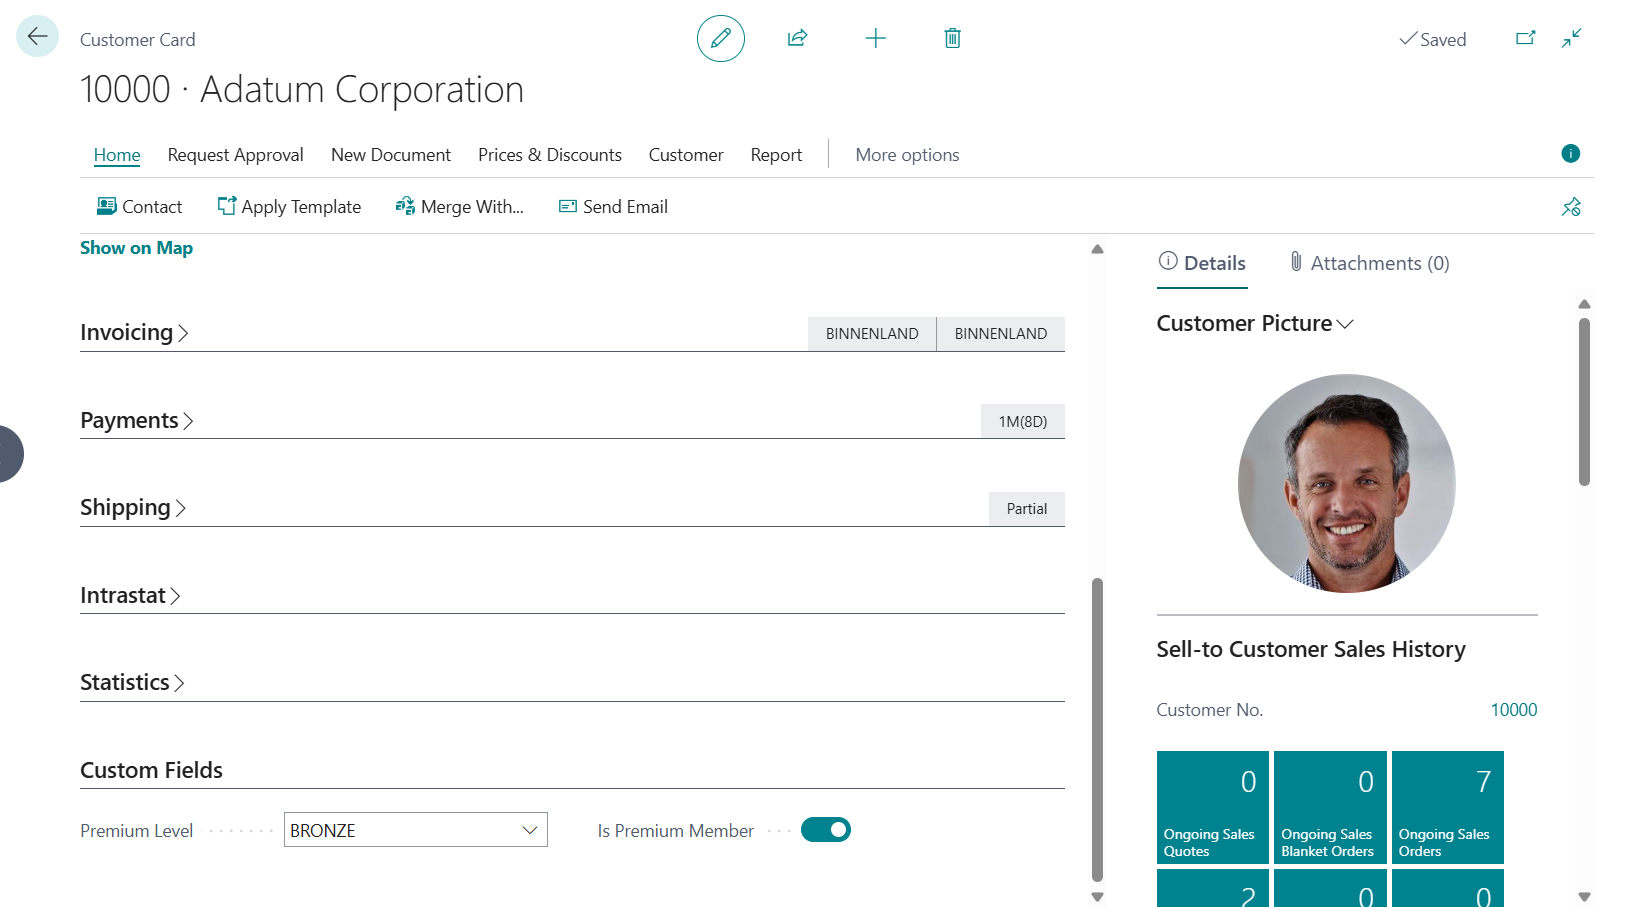
The values defined for the custom field of type Code are available in the lookup, but selecting them from this list is not mandatory.
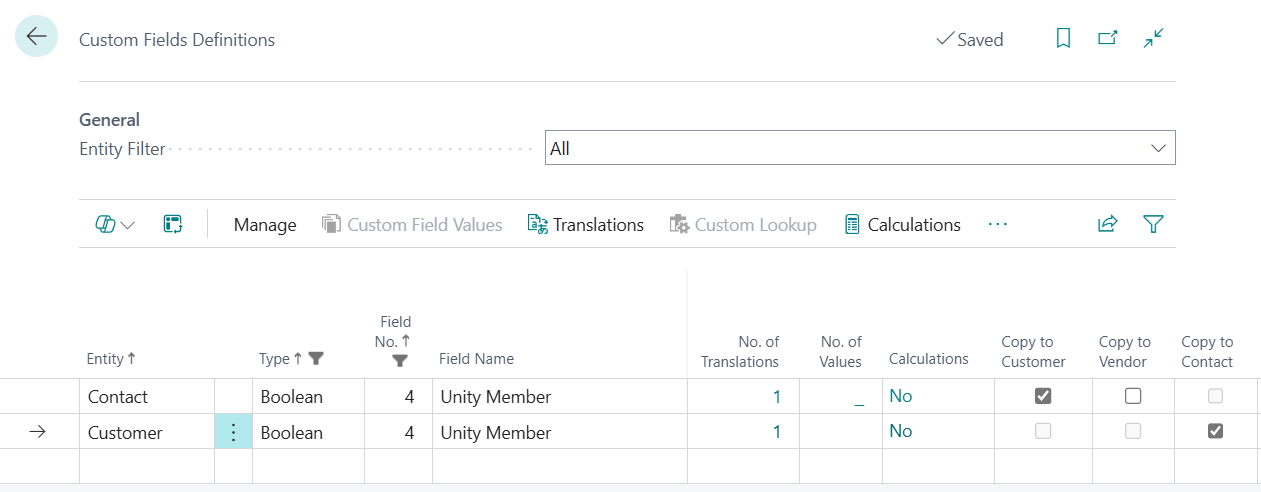
Synchronization of Custom Fields between Contacts and Customers
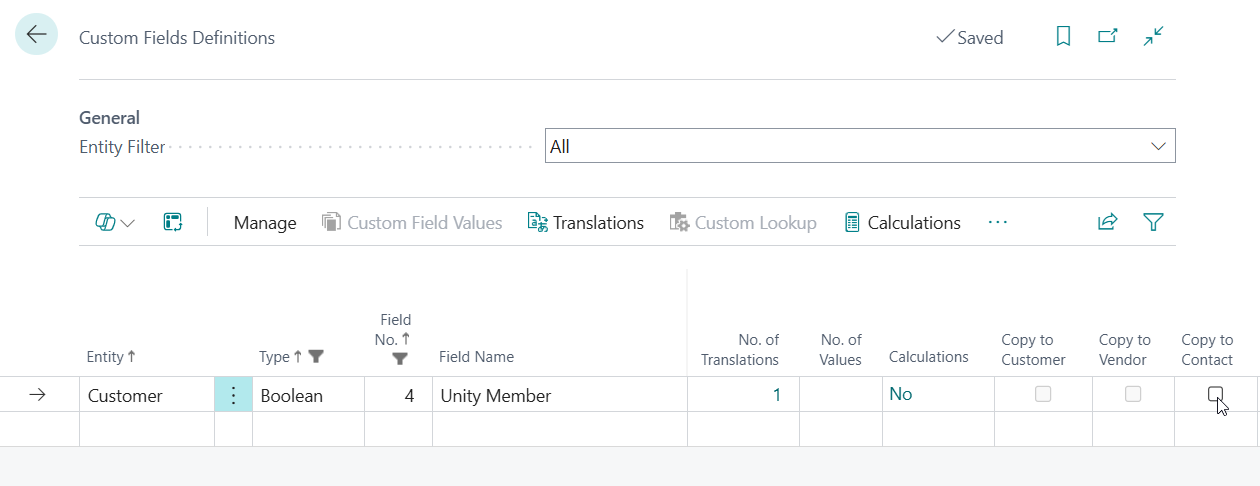
The Apportunix Custom Fields extension includes the possibility to synchronize values of the same type and the same field number between contacts and customers (and also between contacts and vendors), when these records are linked to each other (using Contact Business Relation).
To set up synchronization for a custom field of type Code between contacts and customers:
- Set up a custom field for the Customer entity (see scenario "Add a Custom Field for Customers")
-
Enable the Copy to Contact checkbox field to enable the synchronization.
-
If the custom field does not yet exist for the Contact entity (with the same field number and type), then a confirmation dialog will be shown that asks you to confirm the automatic creation of the custom field for the Contact entity.
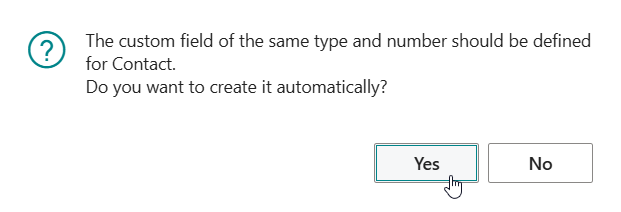
Choose Yes to continue.
-
If the custom field did not exist yet for the Contact entity it will have been created.
The Copy to Customer field will have been enabled for the custom field for the Customer entity to ensure that the field values are kept in sync.
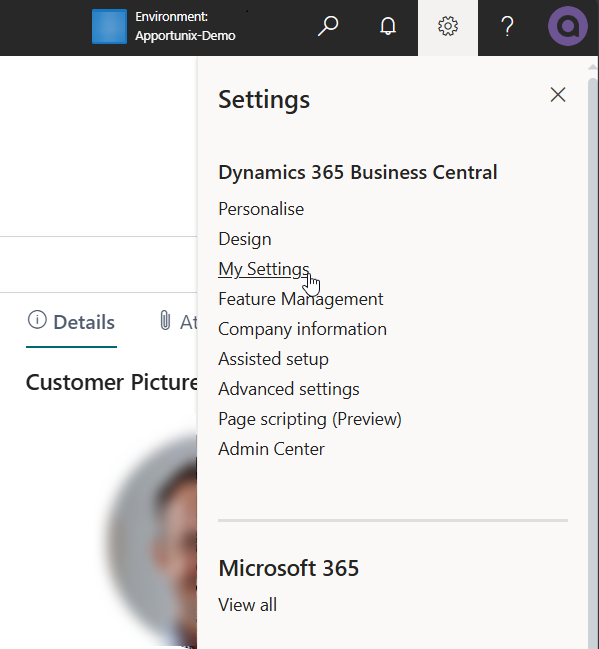
Custom Fields in Other Languages
-
Set up custom fields caption translations for your preferred language (e.g., Dutch (Netherlands)):
-
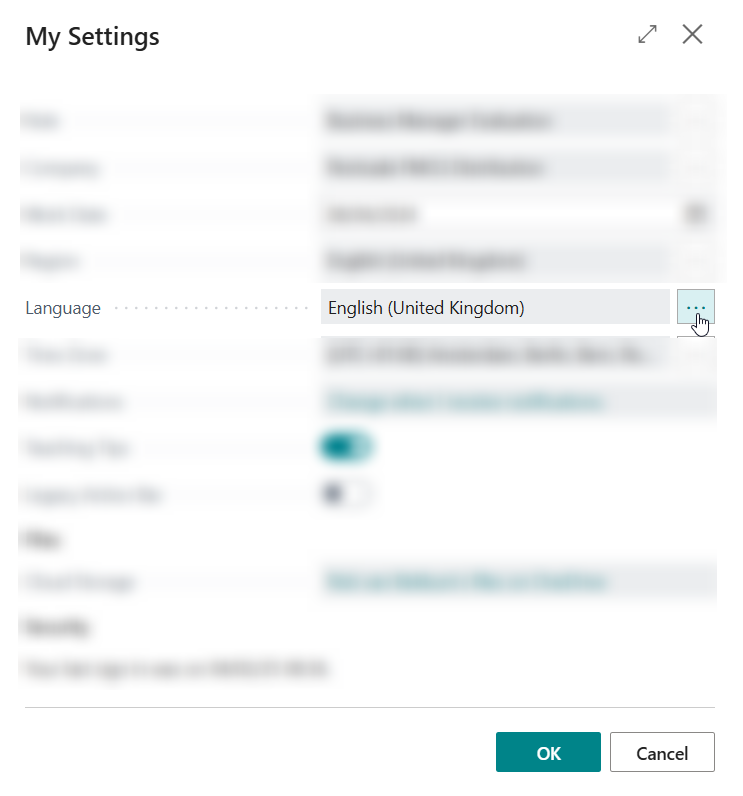
Open the My Settings page and change your Language (e.g., to Dutch (Netherlands)):
-
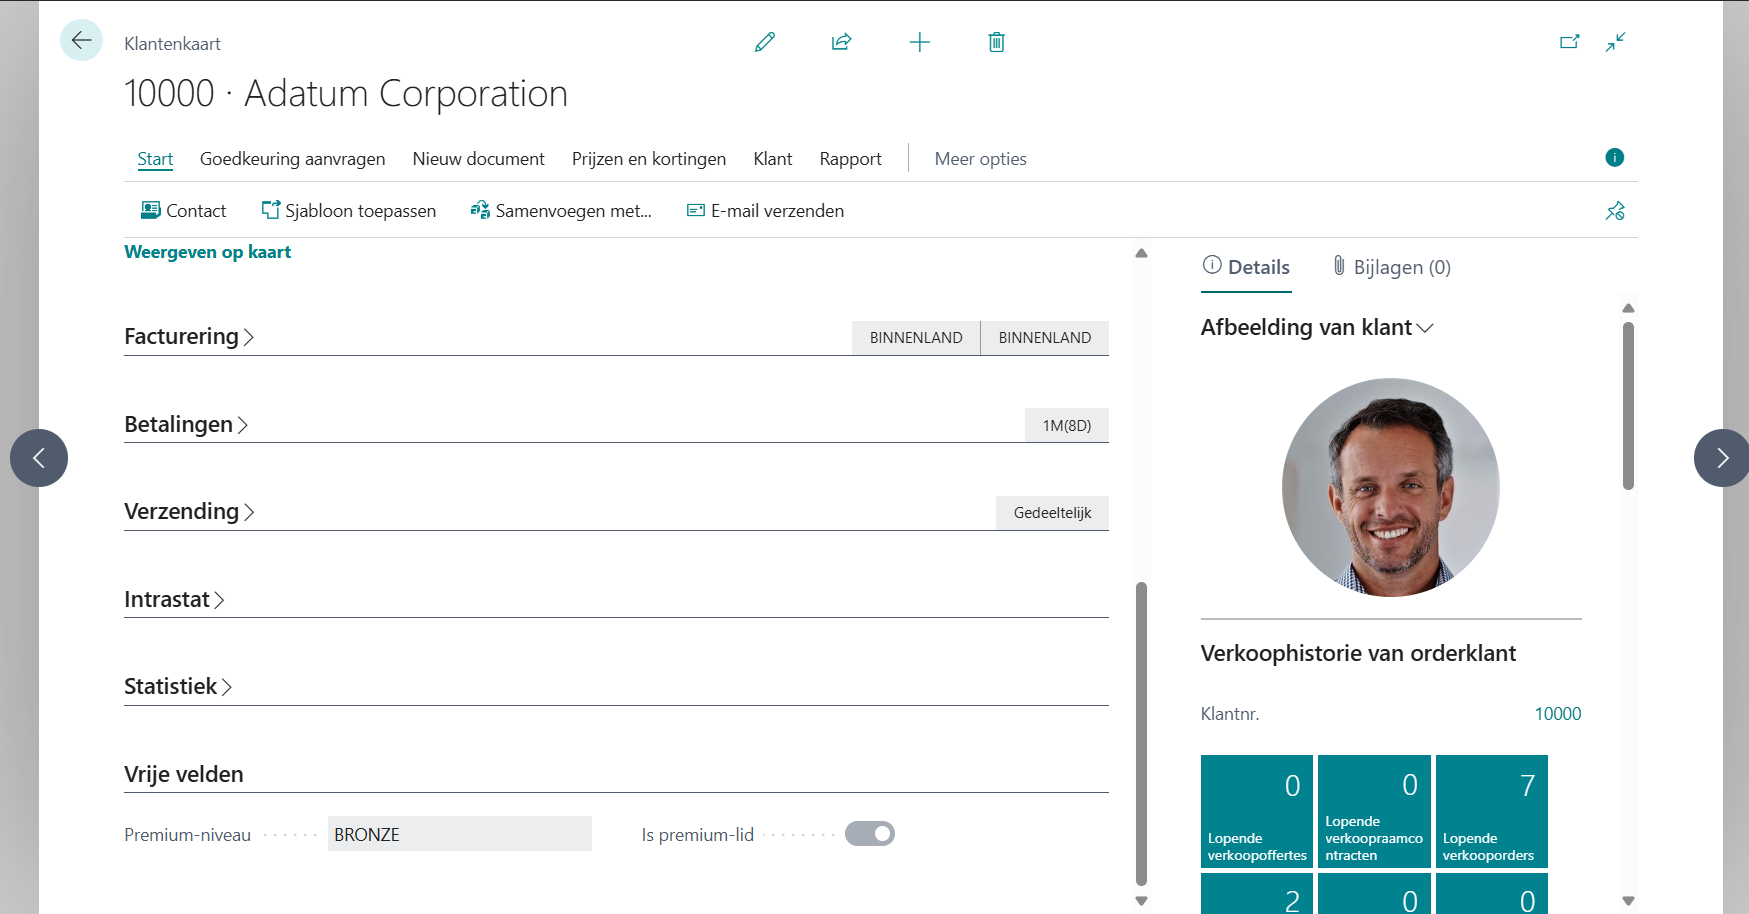
After the language of the Microsoft Dynamics 365 Business Central has been changed, open the Customer card and custom fields are shown with the captions that you configured for your language:
Important
After editing translations please restart your Business Central client / browser for the changes to apply.
Synchronization of Custom Fields between Contacts, Customers and Vendors and their Documents and Projects
The Custom Fields extension includes the possibility to transfer values of a contact, customer, or vendor to the header of their documents, like sales quotes and purchase orders, or projects (only for customers).
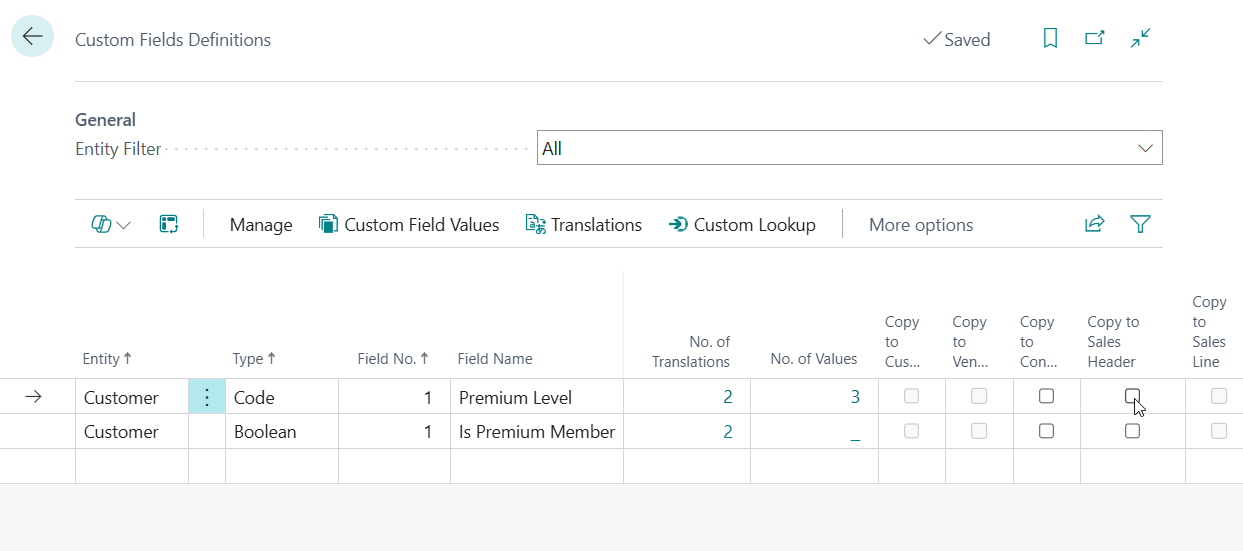
To set up transferring custom field values (e.g., of type Code) from a customer to the header of a sales quote:
- Set up a custom field for the Customer entity (see scenario "Add a Custom Field for Customers")
-
Enable the Copy to Sales Header checkbox field to enable the synchronization.
-
If the custom field does not yet exist for the Sales Header entity (with the same field number and type), then a confirmation dialog will be shown that asks you to confirm the automatic creation of the custom field for the Sales Header entity.
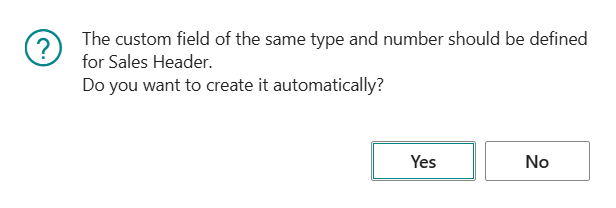
Choose Yes to continue.
-
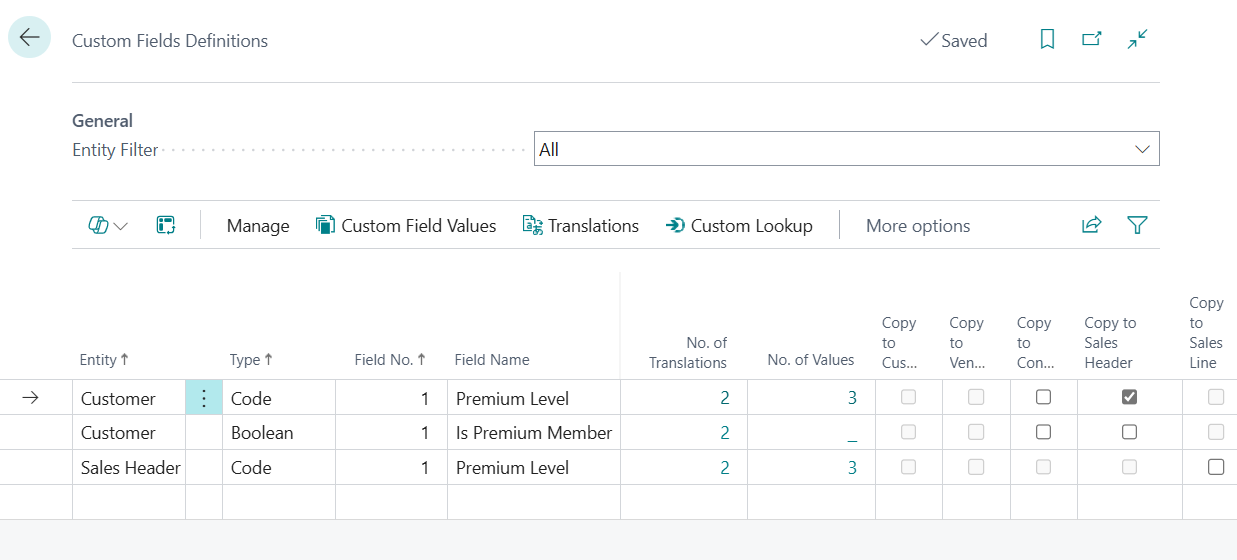
If the custom field did not exist yet for the Sales Header entity it will have been created.
After the configuration is completed, the extension will transfer the values when the customer is used as a sell-to customer in the sales quote.
This same case is applicable for transferring values from vendors to purchase documents, and customers to jobs.
Synchronization of Custom Fields between Items and Sales & Purchase lines
The Custom Fields extension enables the possibility to transfer values of an item to a sales or purchase line.
To set up transferring for a custom field (e.g., of type Text) from an item to a sales order line.
-
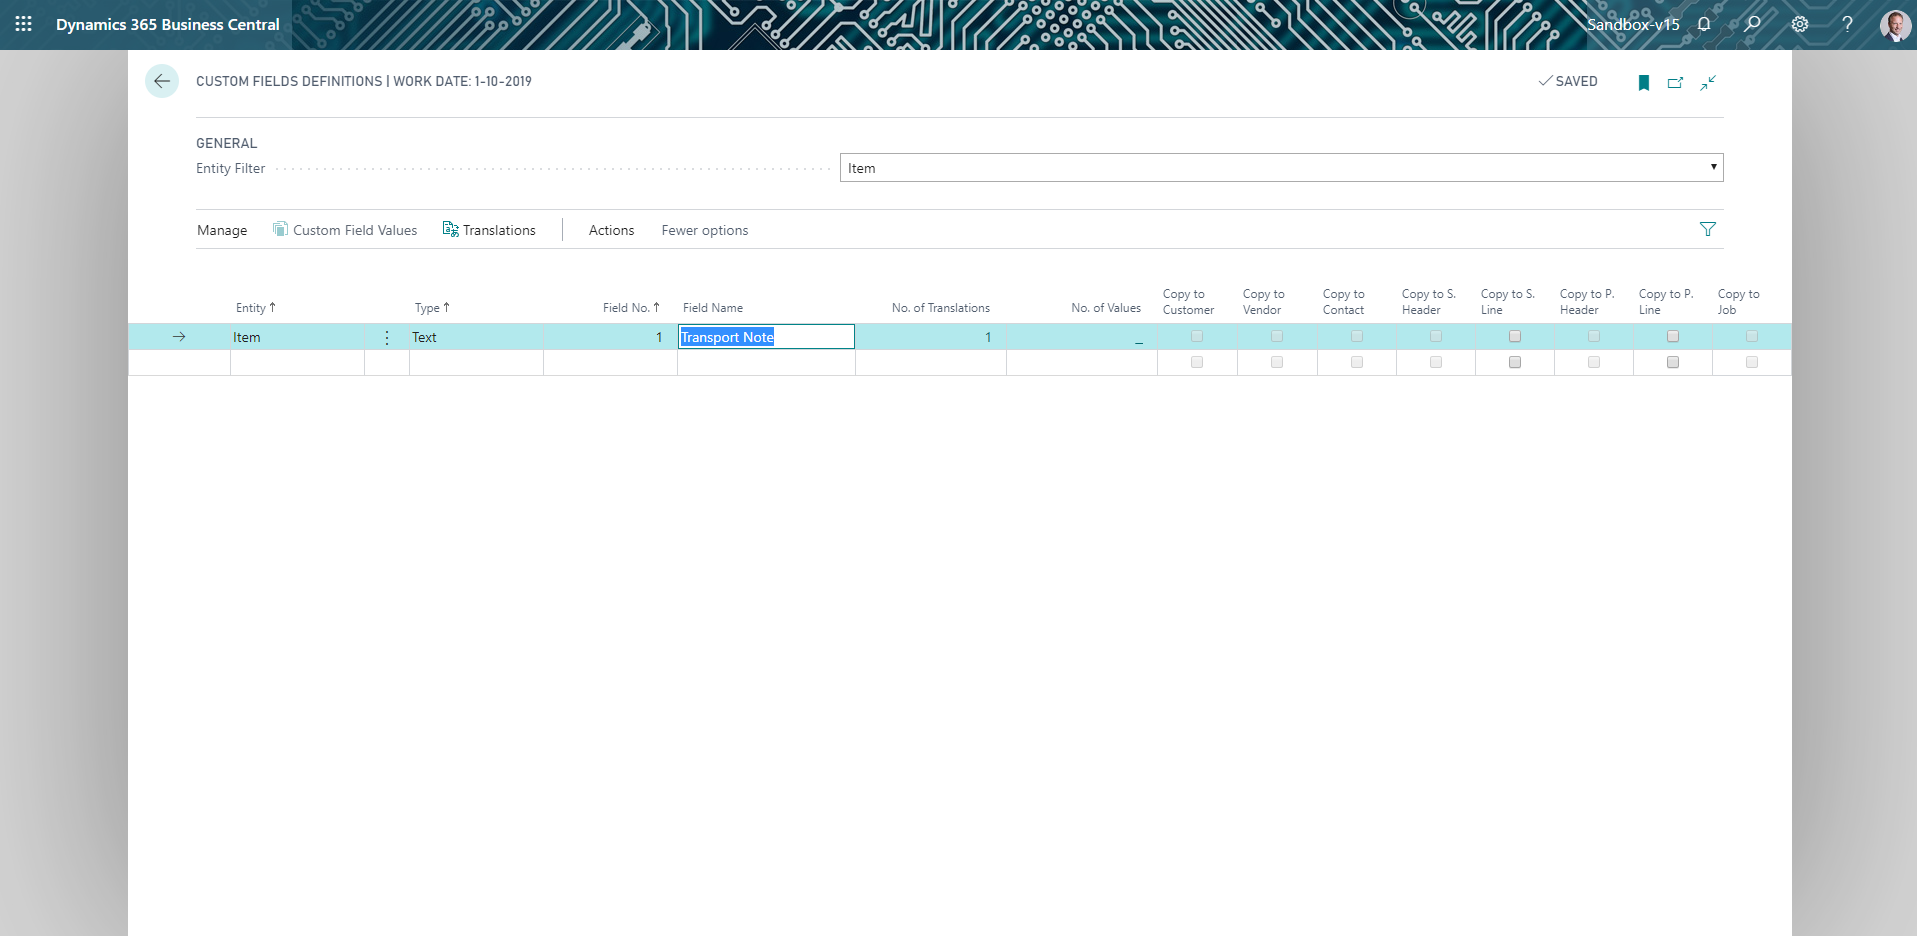
Choose the Item as Entity Filter on the Custom Field Definitions page.
-
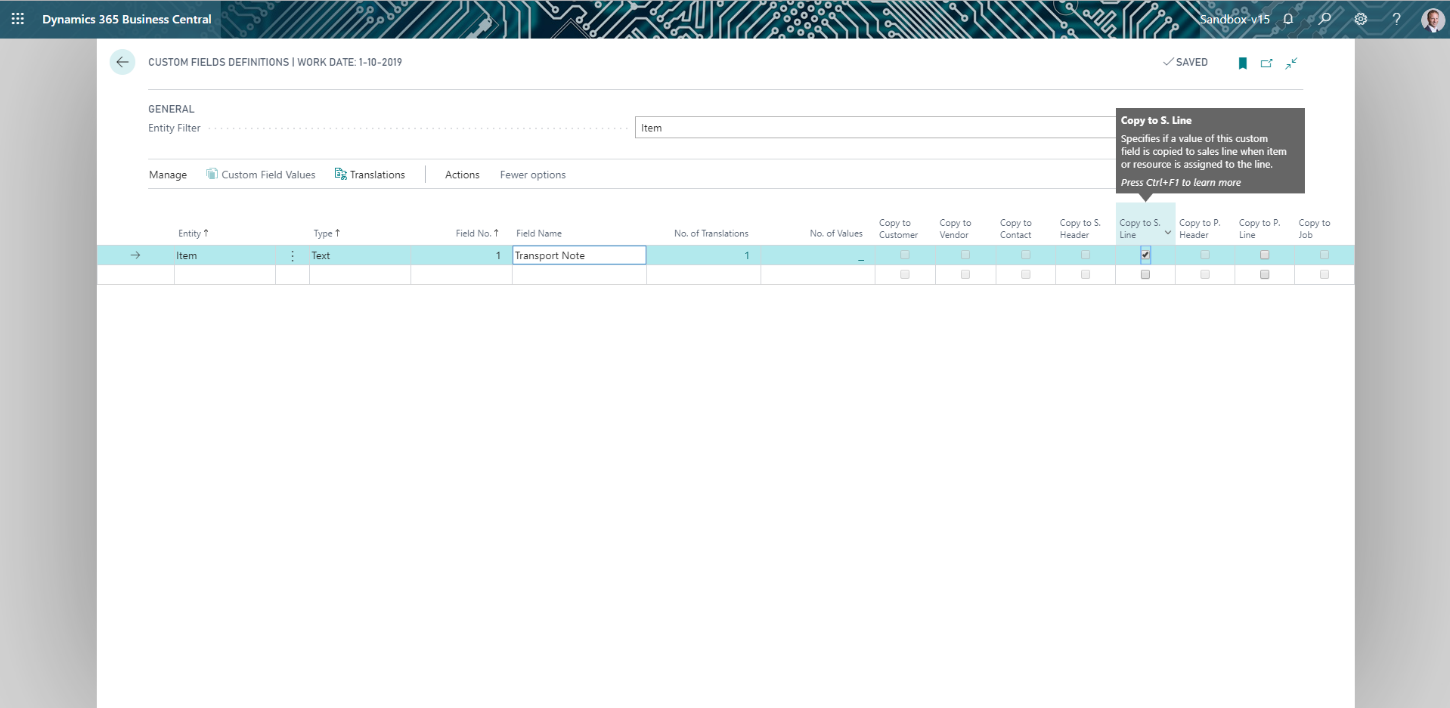
Add a new line, change the Type field to Text. The system will predefine Field No. but the user is able to change it. Specify the Field Name (e.g., “Transport Note”).
-
When the line inserted, the system will automatically add English (ENU) caption for the custom field. This default caption is the same as the field name.
-
Create the same field (as seen in step 1 to 3) for the Sales Line

-
Choose Item as Entity Filter on the Custom Field Definitions page.
-
Enable the Copy to S. Line checkbox on the field created at step 1, that should be transferred to the sales order line.
-
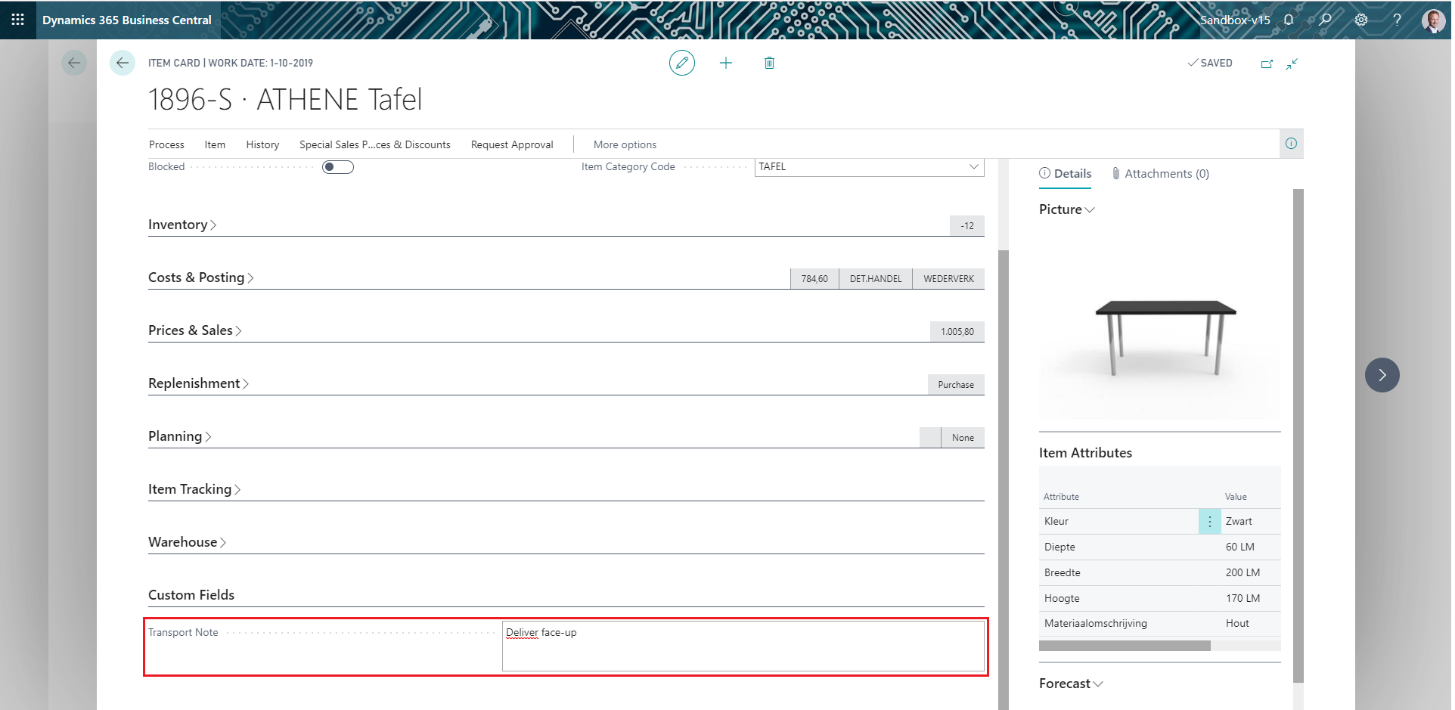
Open an Item Card and fill in the custom field Transport Note on the FastTab Custom Fields
-
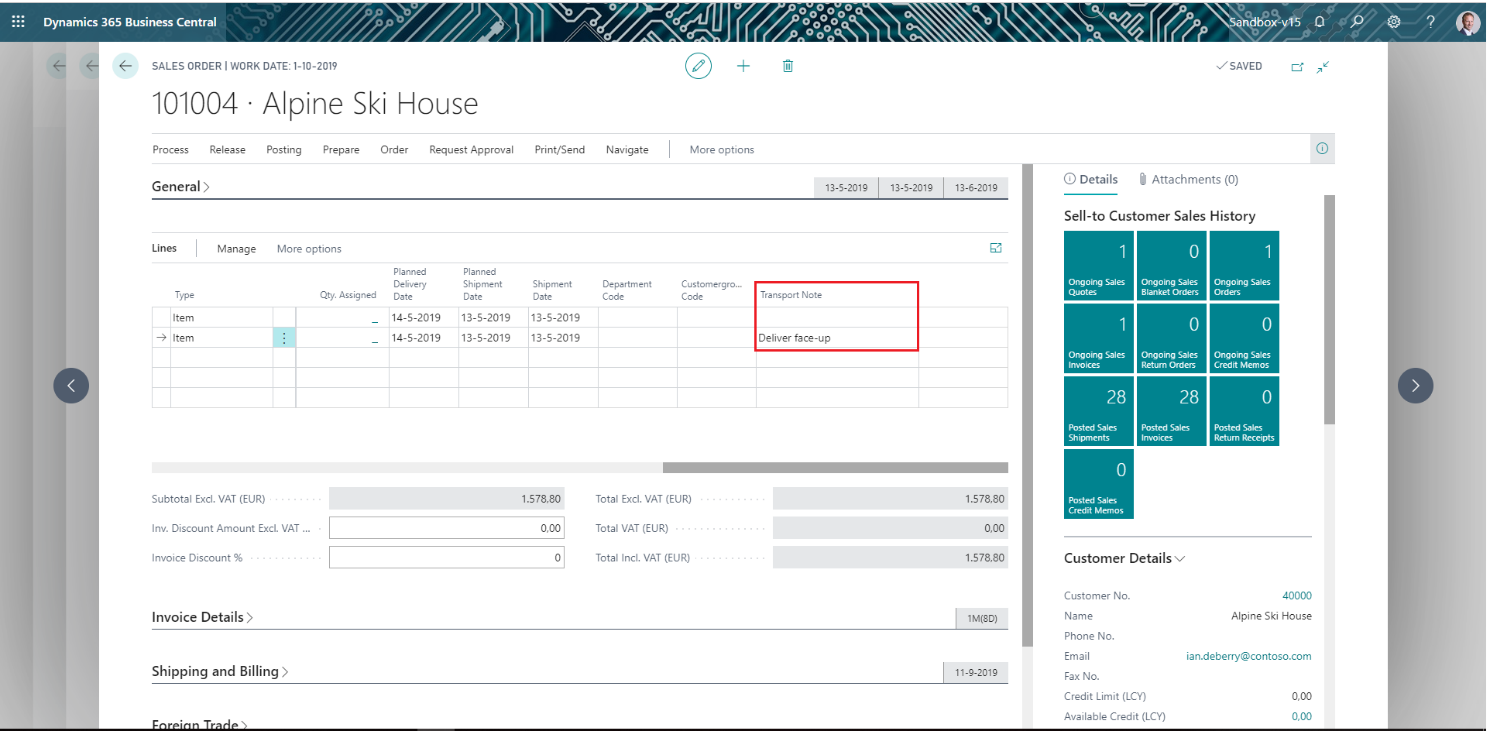
Create a Sales Order and enter the item used on step 7 in the sales lines.
-
Note that the custom field value that we entered in step 7 is automatically transferred to the sales line.
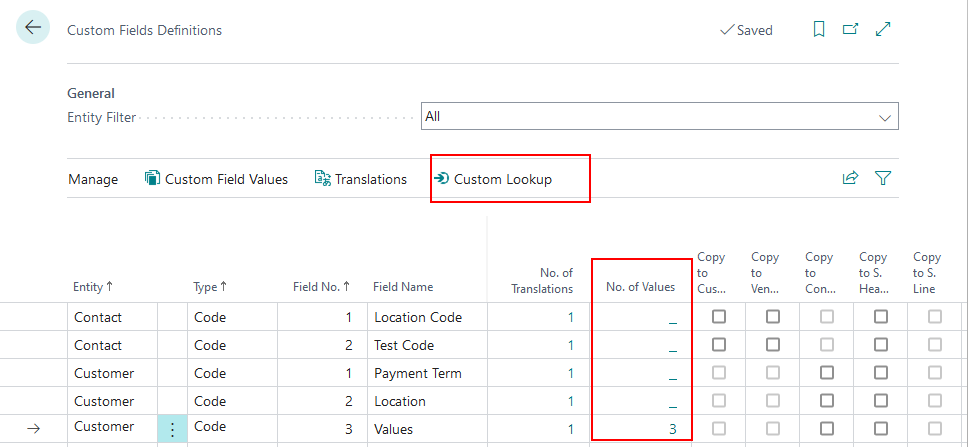
Configure Custom Lookup/Relation for Custom Code Fields
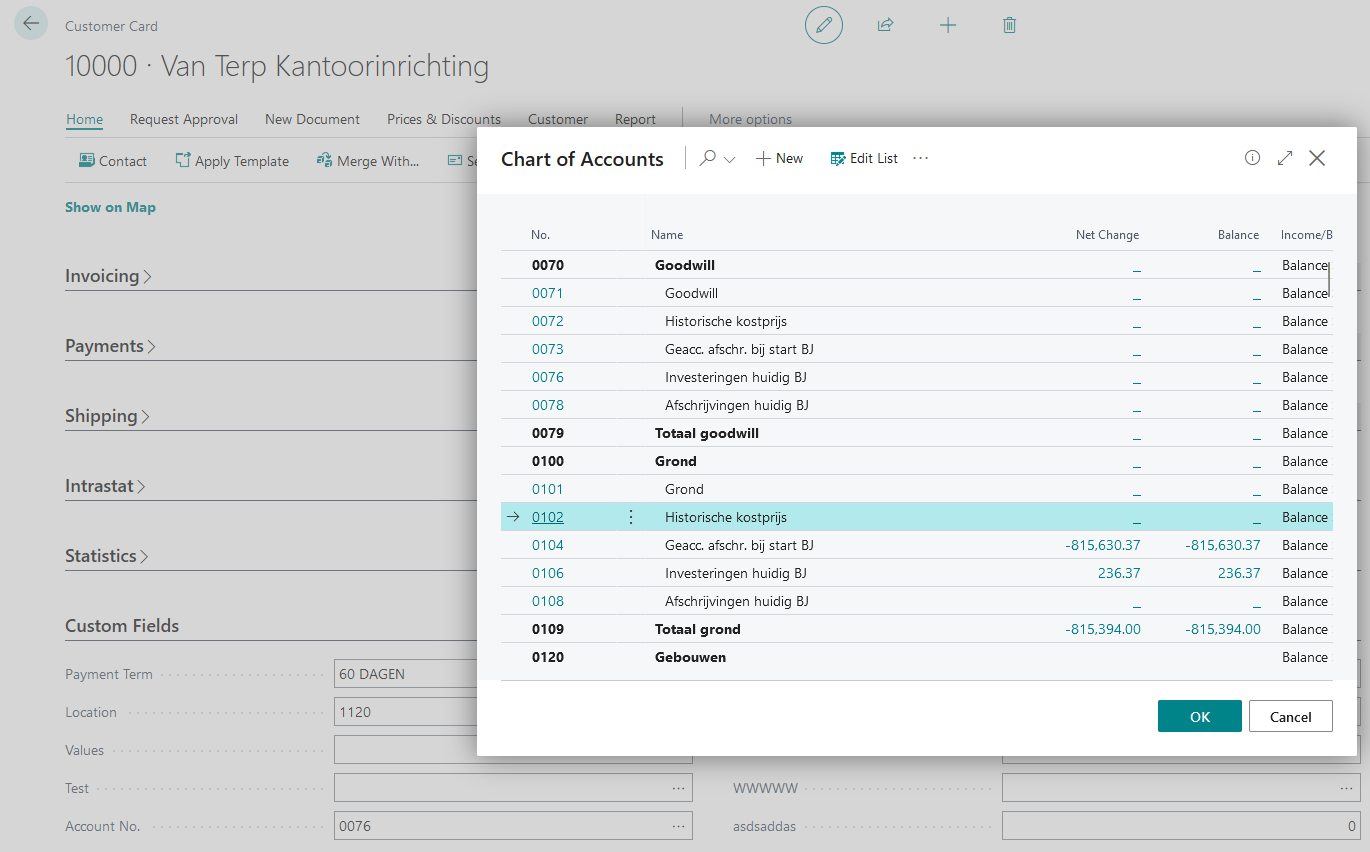
You can use the Custom Lookup functionality to configure a custom lookup for custom Code fields with another Business Central table as the lookup source. In other words, you can make a custom Code field reference other records in Business Central, e.g., a customer, contact, vendor, item, resource, etc.
Important
To use this functionality in a Business Central Production environment a subscription for the Custom Fields Relations product is required.
You can test out this feature for free in a Business Central online Sandbox environment.
To configure a custom lookup for a custom Code field, please follow these steps:
- Select an earlier configured custom field with type Code
- Invoke the Custom Lookup action
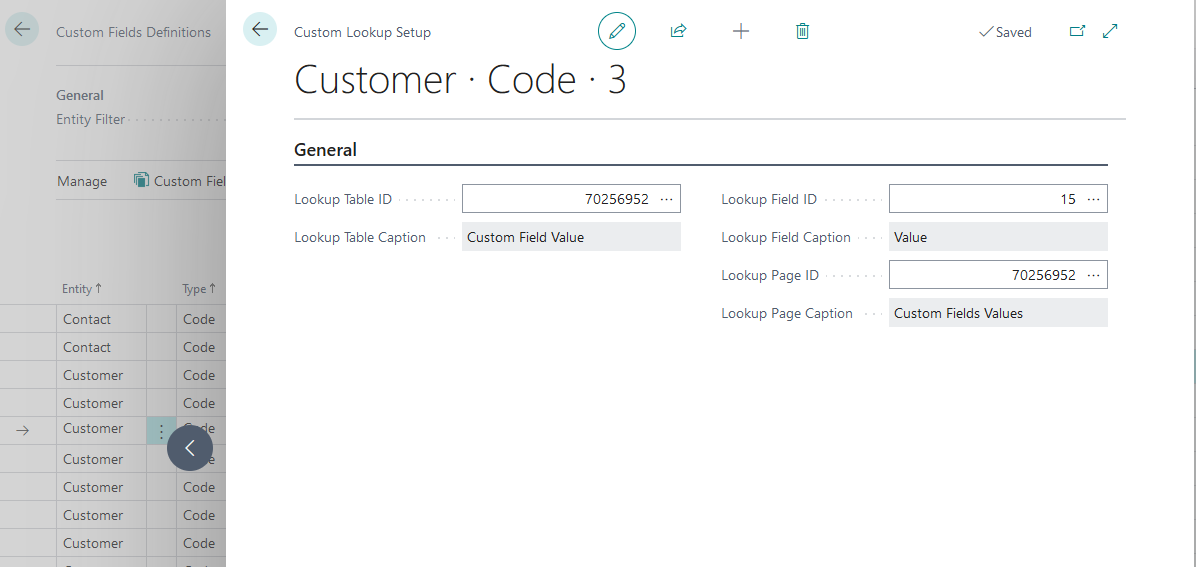
- In the General tab, use the Lookup Table ID field to select one of the available tables in your environment
- Select the desired table from the list and click on OK
- The "Lookup Table Caption" field will now display the name of the chosen table
By default, the system sets the Custom Field Value table as the Lookup Table (as well as the corresponding lookup list page). This is for consistency with previous versions of the Custom Fields app.
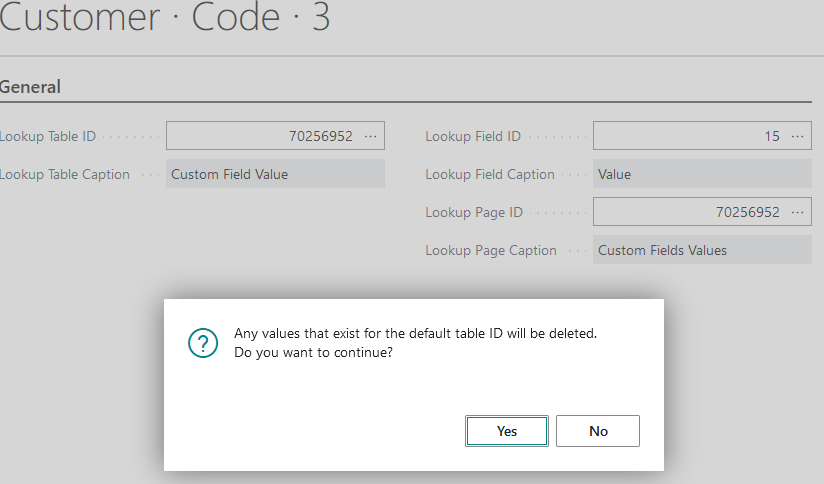
When changing the source (lookup) table for a custom field that already has defined values, the system will request confirmation and delete the existing values.
When the Lookup Table ID is changed, the system sets the (single) Primary Key (PK) field from that table as Lookup Field ID and the default lookup page for that table is used as the Lookup Page. The Lookup Field ID is filtered by Code fields and Lookup Page ID only shows List pages.
After the lookup is configured, the system should display a new lookup page and use the specified Lookup Field ID on the corresponding custom field: