Role Center Tiles
Important
To use this functionality in a Business Central Production environment a subscription for the Custom Tiles & Calculated Values product is required.
You can test out this feature for free in a Business Central online Sandbox environment.
With the Custom Tiles & Calculated Values product it is possible to define custom tiles in the role center and several other entities that can perform a custom-defined calculation (e.g., a count, sum, average, etc.) and show the output of those calculations on your pages in Business Central in a tile.
Getting Started
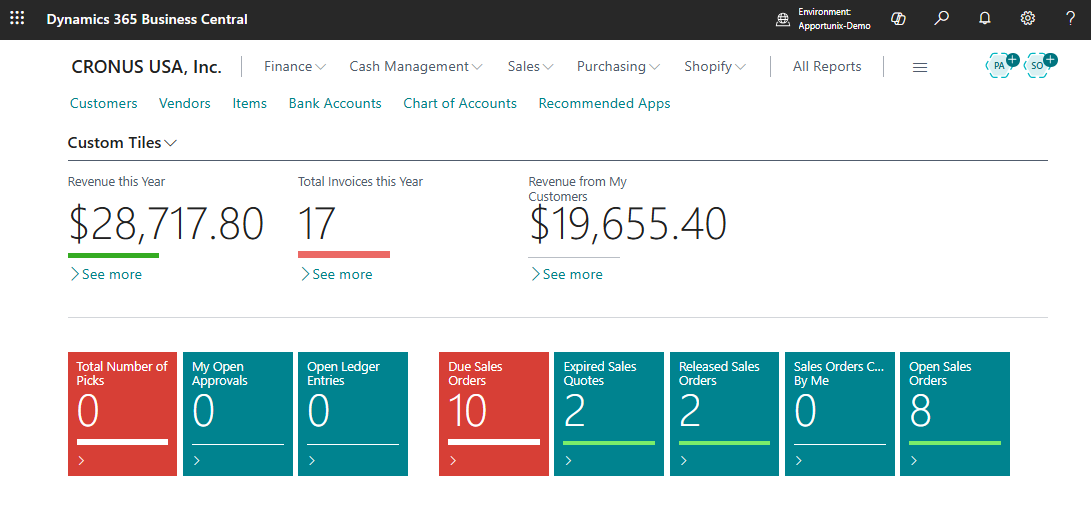
Every default role center of Microsoft Dynamics 365 Business Central is extended with a new page part named Custom Tiles.
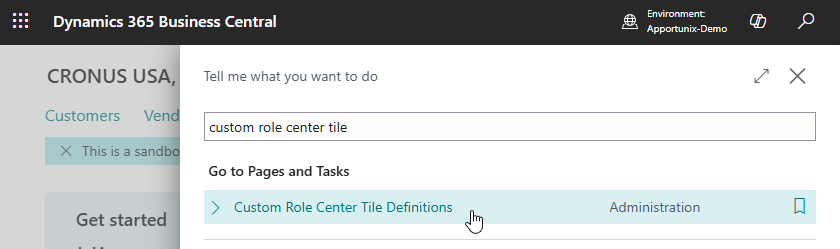
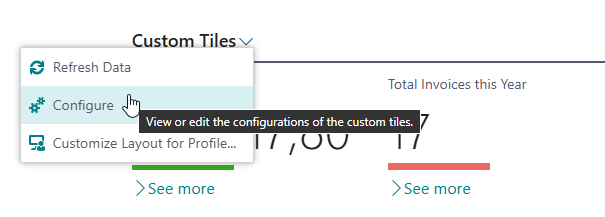
You can view and/or edit role center tiles using the Custom Role Center Tile Definitions page, which you can open as follows:
-
Use the Tell Me search feature (Alt+Q, or click on the ‑icon in the top right corner) to search for and open the page:
-
Or, click on the Configure action available on the Custom Tiles part:
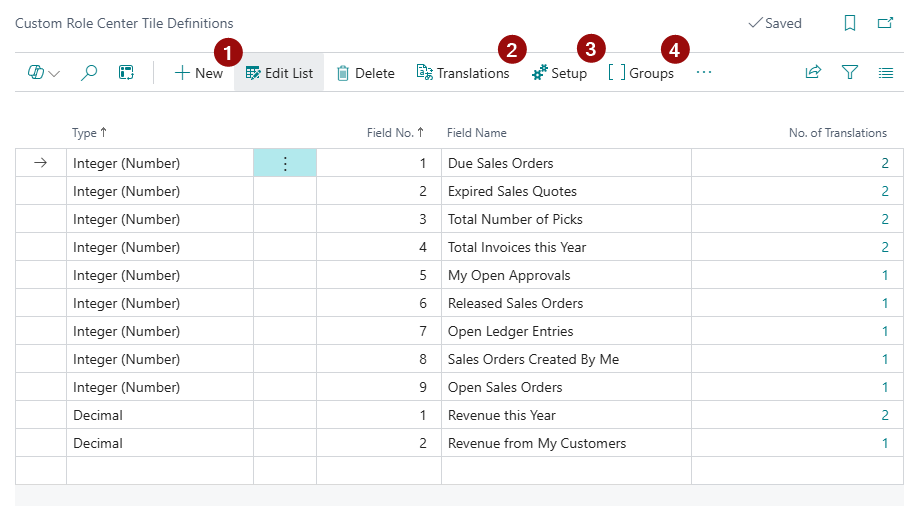
Custom Role Center Tile Definitions
To set up custom role center tiles on the Custom Role Center Tile Definitions page, please follow these steps:
-
Create a new custom role center tile by clicking on New.
-
Translations
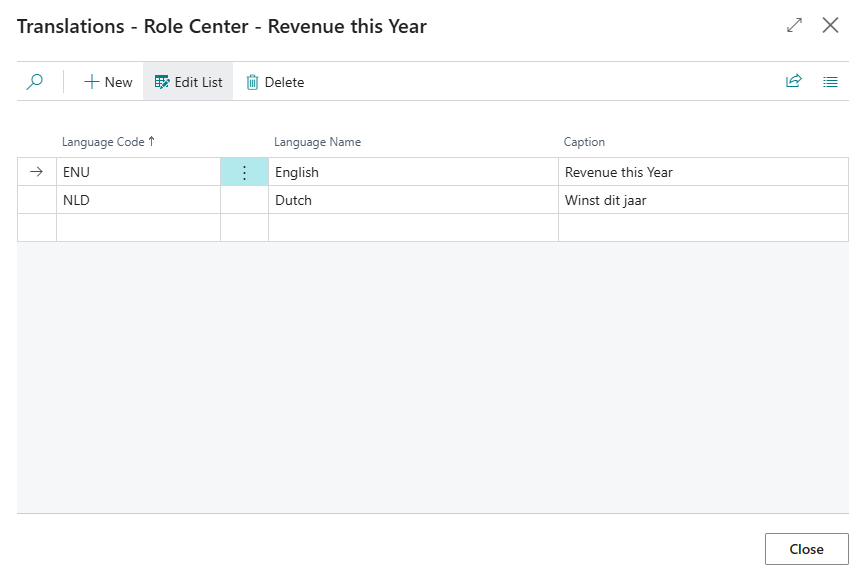
After creating a new tile, you can translate the name/caption for other languages. Use the Translations action to edit the translation to your preferences.
-
Tile Setup
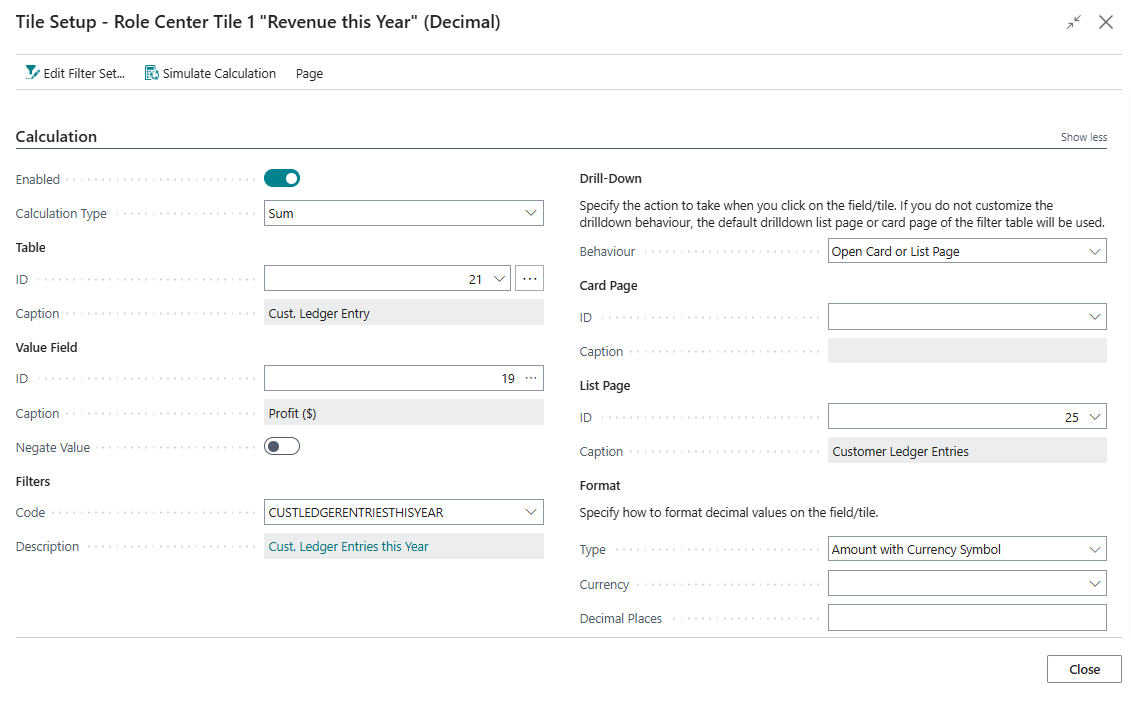
To configure the calculation for your custom role center tile click on the Setup (3) action.
This opens the Tile Setup page where one can configure tile-specific preferences for a custom tile.
Group
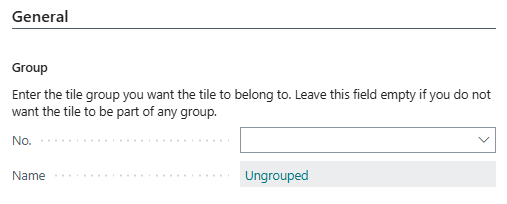
In the General tab you can configure which Group the tile should be placed, if any. When you don't choose a group, the tile is being placed in the 'ungrouped' section of the Custom Tiles role center part.
Calculation
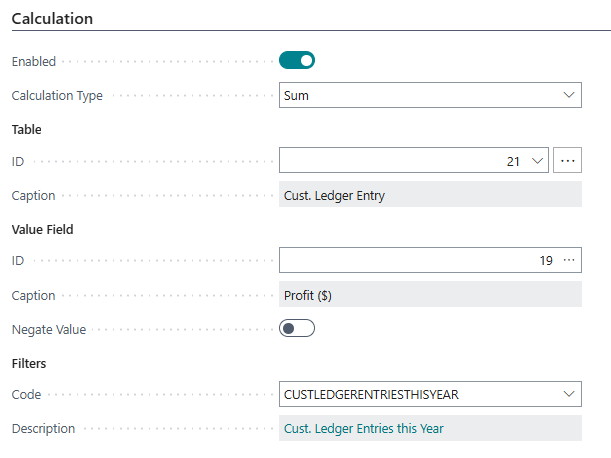
The Enabled field allows you to enable or disable a tile in all role centers. When this field is disabled, the tile value is not calculated and the tile will not be visible.
The calculation for the tile is configured by choosing a Table to aggregate records from, a Value Field to get the value from (if applicable for the calculation type), and setting up a link between the entity table record and filter table by configuring a (reusable) Filter Set via filters.
For more information about how to configure the calculation of the role center tile, please check the Calculations section of the user manual for detailed documentation.
Caution
Please make sure to take performance into consideration while configuring the calculations for custom role center tiles. Even though the calculations are always computed in the background, poorly optimized field definitions could be detrimental for the user experience (e.g., users getting annoyed that custom tiles take a long time to load).
Please note that you can use the Simulate Calculation action (on the Tile Setup page) to get an indication/estimate of the time needed to calculate the output of custom tiles. This can be a helpful tool to help to investigate/troubleshoot long loading times for custom tiles.
-
Tile Groups
Finally, it is possible to set up different Groups in your role center where you can place your tiles. You can use the Groups button to view or edit your role center tile groups.
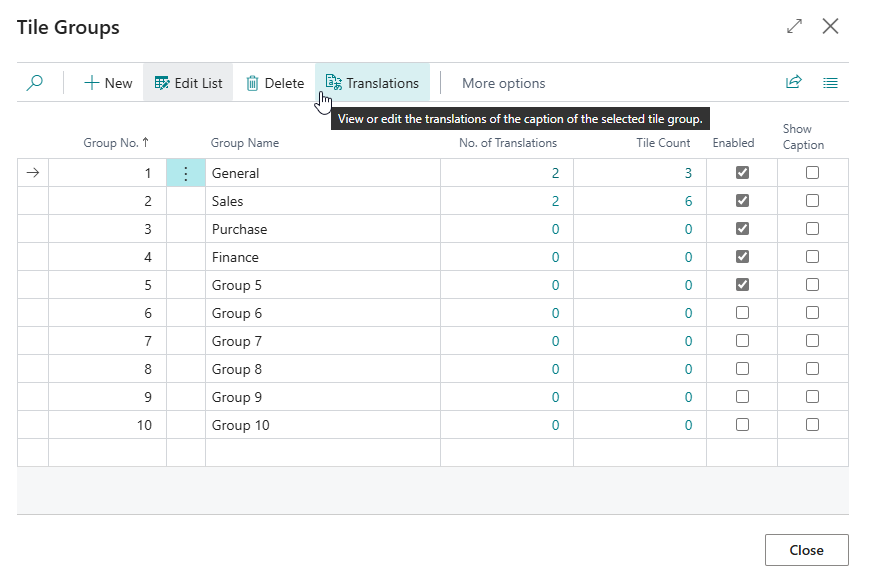
You can control the visibility of group captions using the Show Caption field.
When you have users working in other languages you can setup translations for the group name using the Translations action.
Important
It's possible to set up 10 different groups for the Custom Tiles role center page part.
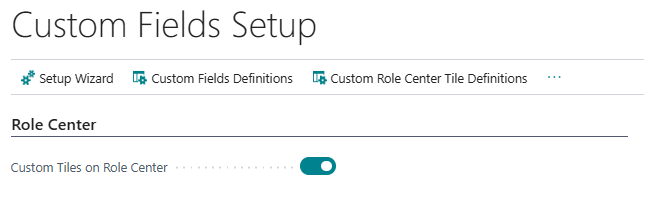
Show/Hide "Custom Tiles" Part for All Role Centers
On the Custom Fields Setup page you can change whether the Custom Tiles part should be shown on role centers.
The Custom Tiles on Role Center setting determines whether the Custom Tiles part is available on role centers. If you disable the setting, then the Custom Tiles part will be hidden on all role centers.
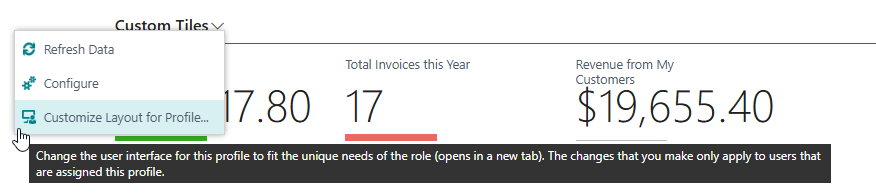
Customizing Layout per Profile
As mentioned earlier, by default every Role Center is extended with a Custom Tiles part. It's possible that not every role center has the need for the same tiles. Therefore, it's possible to customize the visibility of your tiles for specific Business Central profiles.
To customize the role center for a profile, click on the dropdown of the Custom Tiles part and then click on Customize Layout for Profile....
Your current profile will be selected by default in the list that opens, but you can also select a different profile for which you would like to customize the layout of the role center.
Examples
"Sales Orders Created By Me"
In this example we are going to look at adding a Sales Orders Created By Me tile to the role center which looks up all the records that are created by the logged in user.
- Open the Custom Role Center Tile Definitions page and click New
- Choose Type = Integer (Number)
- Give your tile the name Sales Orders Created By Me
- If needed, give your tile the needed Translations
- Open the Setup
- Set Calculation Type = Count
- Set Table ID = 36 (Sales Header)
- Create a new Filter Set, the code is filled in automatically
- Give it the right Description, for example Sales Orders Created By Me
- Choose the right Key ID, in this case I choose 1, which stands for Document Type,No.
- Setup the right Filters:
- Filter Field ID must be 1 (Document Type), the Constant Value for this field must be 1 (Order)
- Filter Field ID must be 2000000002 (Created By), the Filter String for this field must be
USERSECURITYID
"My Approvals"
In this example we are going to look at adding a My Approvals tile to the role center which looks up all the records that must be approved by the logged in user.
- Open the Custom Role Center Tile Definitions page and click New
- Choose Type = Integer (Number)
- Give your tile the name My Approvals
- If needed, give your tile the needed Translations
- Open the Setup
- Set Calculation Type = Count
- Set Table ID = 454 (Approval Entry)
- Create a new Filter Set, the code is filled in automatically
- Give it the right Description, for example My Approvals
- Choose the right Key ID, in this case I choose 1, which stands for Entry No.
- Setup the right Filters:
- Filter Field ID must be 8 (Approver ID), the Filter String for this field must be USER
- In this case we always want to open the list page, so we set the Behaviour to Open List Page
- Select the right page ID under List Page to ID 658 which is the Approval Entries page.
-
We want to set the style to Unfavorable when we have more than one record that must be approved.
To achieve this, in the Conditional Styles tab we enter a record with the following configuration:
- Entry No. = 1
- Style = Unfavorable (Red)
- Value Filter String =
>0